Showing posts with label 16th century. Show all posts

Wednesday, June 26, 2013

Purple Silk Venetian Gown

A while ago, I posted some progress on a purple silk Venetian gown. It's done now! I wore this to Coronation recently and got some photos. The silk is actually hot pink shot with blue, so it appears purple.
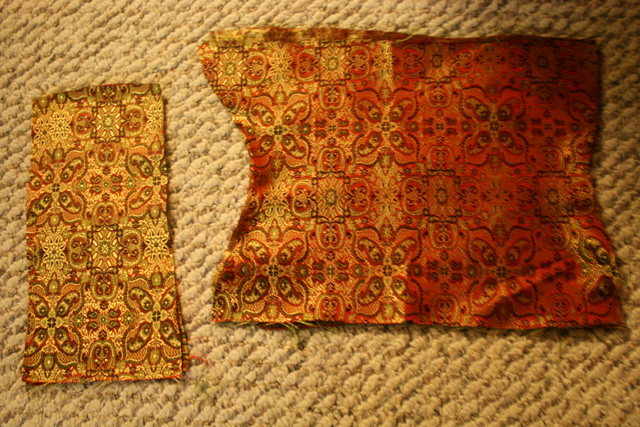
The bodice is fully supported with canvas interlining and steel boning. The gown is also worn over a corset and camicia, as well as a taffeta underskirt. The front insert is made from a small piece of silk brocade - a scrap - that I inherited. The bodice is hand beaded, and I also made a new girdle / belt and a linen partlet. The sleeves are re-used from my last Venetian gown because I love them and they match!

I made this one regular height - no chopines for me! I love my chopines, but man, I'm too clutzy to stand around in them all day!


Thursday, June 13, 2013

Striped Venetian Gown: The Beginning

I wanted to make some more late period garb to wear around casually (Okay, HA!HA! it's totally formal, but I still intend to wear it "casually"). I had this awesome fabric I inherited in remnant pieces. Because I am both small and short, there was enough to piece together a gown for me! And...well, it looks remarkably like this late period Venetian gown, so I'm sort of cosplaying these portraits, combining elements of both.


Here are the bodice and sleeve pieces for this striped Venetian closed front gown. The bodice pieces have an outer layer sewn to a linen lining and canvas interlining. The two linings were first sewn together and stitched with boning channels, and the boning is inserted: 1 in center front, 2 diagonal from bottom front to armpits, 2 at sides of front, 2 at sides of back.


Tuesday, May 28, 2013

Venetian Gown Progress

I've been working on a new Venetian gown! How did this come to be, you may ask? Well, a while back, I came upon this fabulous dupioni silk. It's hot pink shot with blue, so it appears different shades of purple-ish depending on the light and angle. I got a deal on the remainder from the bolt and set it aside, wondering what should I make it into. A wonderful fantasy gown for my collection, perhaps? A fabulous fanciful historical gown for myself? Finally, fanciful Venetian gown won! I don't have a portrait of anyone wearing this color, but it makes me really happy. I have seen mention of shot fabrics in period, and they did have pinks and blues. And, yes, various qualities of silk did exist, not only smooth silk. Smooth silk, however, would have been preferred, as it was (and is!) more costly and higher class ish.

Enough of my rambling. The gown is a basic bodice pattern with an open V in front. The ladder lacing goes through some lacing rings I stitched to the inside. I wear a corset underneath, but I still added boning to the bodice to maintain the shape. The skirt is cartridge pleated, which I did in the library one day! I reinforce my cartridge pleats, when the fabric is so thin, with a satin ribbon. I did some hand beading on the bodice, and the insert is silk lined in linen with an interlining, the same as the bodice itself. The insert will be pinned to my camicia when worn.

It's almost done! I actually just need to make a petticoat! I'm going to wear my old cutwork sleeves for now - or go sleeveless when it's warm.


Friday, May 17, 2013

Teal Kampfrau Dress

I don't believe I shared this dress on my blog yet. This is a 16th century German style, also seen amongst the Swiss. These ladies are now known as kampfrau or trossfrau, and they followed the Landsknecht soldiers.

This dress began as an underskirt for my other kampfrau dress, my first year in the SCA. I later made the bodice and turned it into a new dress. I mean, when you have such fun colors, it's hard to just hide them!
The hat, known as a wulsthaube, was a pretty recent project. It's made from a sort of padded roll structure sewn to a thick headband piece, and the veil is tied on top.

More photos here: http://www.faerie-queen.com/teal-german-kampfrau/


Saturday, April 27, 2013

Landsknecht Gown

I made this gown and smock for a customer. She wanted a yellow, black, and white 16th century German gown, and I was quite happy to make it for her! The women who wore this style are often referred to as kampfrau or trossfrau, the women who followed the Landsknecht soldiers in Germany and Switzerland.
The dress is made of linen with wool guards, and the bodice laces in the front. There is a little bit of visible machine stitching, as normally happens when you're working out a reasonable budget, but I have a lot of tricks to make it very minimal.

I took photos of the dress pre- and post- slashing. Both ways are acceptable style options, but in this case, we were going for the more detailed slashed version.

I'm really happy with it! I was actually thinking about how I'd like to make a new slashed German gown so I could implement my new research into it, and then this one just came to me!


Tuesday, February 5, 2013

Elizabethan Corset For Sale

Elizabethan corset for sale! This was going to be my new standard linen one for my Tudor/Elizabethan gowns, but I cut it from the wrong size, so I went ahead and finished it and put it up for sale. It's discounted because I can't use it, so I may as well just get it out of here! It can also be used for regular fantasy costuming, as well as historical. The boning is minimal, so the corset is supportive but not overly constrictive, just comfortable and holds you in place!

This one will fit a waist size of about 27-30" (most ideal is 28-29"). It may fit up to a 32" waist with a small gap in front.

Marked down to $90, rather than the normal $220 for a custom fitted version of this.

http://shop.daisyviktoria.com/corsets/ready-to-ship/elizabethan-corset-ready-to-ship.html


Saturday, February 2, 2013

16th Century Venetian Lady Garb

I got some nice photos of my gown at 12th Night! I've been meaning to take good photos of this, but I rarely wear it since I am normally pretty active at SCA events. I do really love it though, and 12th Night was the perfect event for it!

This is the late 16th c. Venetian gown I made for myself. The chemise, or cam­i­cia, is made of white linen. The corset is white silk and fully boned with reed, com­plete with hand-stitched bon­ing chan­nels. The part­let is white lace in a Venet­ian style pat­tern with a stand-up col­lar around the back. The gown itself is made of bur­gundy silk/rayon blend vel­vet with sleeves and con­trast­ing hem made of blue silk dupi­oni. I did all of the cut­work pat­terns in the silk by hand. The skirt is car­tridge pleated onto the bodice, which laces with Venet­ian style lad­der lac­ing. The gown is accented with jew­elry and a flag fan, also all made by me. In addi­tion, I cre­ated chopines, tall plat­form shoes. My chopines are made from cork with fab­ric dec­o­ra­tion.

More photos here: http://www.faerie-queen.com/burgundy-velvet-venetian-gown/


Wednesday, January 30, 2013

16th Century Venetian Man Garb

I finally have nice photos to share of our late 16th c. Venetian garb! We rarely wear this stuff because my boyfriend and I both prefer running-around / working - friendly garb at SCA events. This post is dedicated to his ensemble, and I shall post mine next.

This is based on fashion from late 16th century Venice, ~1570s. (I mixed and matched inspiration images, as one of my very favorite things about making clothing is the whole design aspect.)
The undershirt is made of white linen and was actually already in his wardrobe.
The doublet is made of red silk with detachable tie-on brocade sleeves.
The hat is black velvet with ostrich feathers.
The pants are black linen, made in the Venetian style.
The coat, or loose gown, is made of silk/rayon blend velvet and lined in black. The slashes in the sleeves show a blue brocade underlayer.

You can see more images here: http://www.faerie-queen.com/venetian-male-ensemble/


Monday, November 5, 2012

Blue Renaissance Dress

I made this dress for my friend, Lady Cecilia. She wore it for the first time to Great Western War, so yay, pictures! This is a pretty versatile 16th century Renaissance dress, or kirtle, worn throughout Europe. It is a single (lined) layer, worn over a chemise that she made and embroidered herself. The single layer helps the dress to be climate-appropriate for southern California summers - and springs and falls. In addition, I built some support into the bodice so Cecilia does not need to wear her corset, once again cutting down on layers and making it easy to get dressed!

You can see more on my website: http://www.faerie-queen.com/blue-renaissance-dress/


Tuesday, October 30, 2012

16th Century Kirtle

This is my first non-corseted 16th century kirtle. It's probably pretty obvious by now that I make a lot of 14th and 15th c. kirtles. While I've done some 16th c in the past, this is normally the century I skip in reenacting. Well, I've recently found some 16th c. dresses I really like, so I wanted to start by making a versatile kirtle. I made it lace on the sides so it will never pose an issue with the various styles I want to do.

It's blue linen, lined in natural linen.
Please forgive my t-shirt. I just really wanted to put on the kirtle as soon as I finished sewing it! I have a couple of chemises in my closet.


Monday, September 24, 2012

Indian Garb

This is an Indian outfit I made several years ago, I believe in 2008. It's based on late 16th century images. I've worn it only once before because I had made it for summer and then it ended up being really cold! Then it got pushed to the back of my closet and forgotten. I just wore it this weekend to our local archery and thrown weapons competition, partially because it was hot and partially because I wanted photos.

The choli and skirt are made of patterned silk, and then there is also an underskirt. This could also be worn with a sari on top, I just like to show off my fancy fabric! ;p

More photos are here: http://www.faerie-queen.com/purple-indian/


Monday, August 27, 2012

New German Dress

I started this dress about 5 years ago and then never got around to finishing it until just now. It's first half of 16th century, German - or Swiss. It can be categorized with kampfrau or tossfrau garb. The dress is made entirely of linen, and the hat is actually a wool structure underneath (just because I had a scrap of wool handy!) with a linen veil tied around it.

More pictures coming soon!


Thursday, February 16, 2012

Venetian Male Outfit Construction

Here are some progress pictures from the construction of my boyfriend's 1560s Venetian outfit.
I made his doublet from a new pattern, drafted on his body and based on some extant patterns from Janet Arnold's Patterns of Fashion. His doublet is dupioni silk lined in black linen. The sleeves are brocade, and they attach with ribbon ties. For pants, he has the Venetian style in black linen.


To complete the ensemble, I made an overcoat / loose gown for him. The coat is made from the same velvet as my gown, and it is lined in black silk/rayon blend. I added faux fur trim to the front. The sleeves are slashed, and I made them by cutting strips of my velvet and silk and sewing them together. The undersleeves are brocade, made from the same pattern but without the slashing.


Monday, February 13, 2012

Chopines

Chopines are these amazing platform shoes from the Italian Renaissance. They were quite helpful in keeping skirts out of dirty streets, and as with many things, they grew to become an elaborate fashion item.

I had wanted to make chopines for years, and finally, I got around to it! Oh, I had attempted it before. I tried wood blocks and found that my strength with tools was just not up to par. This time, I went with cork. You need high density cork for this project, and most of it comes in very large blocks that were out of my price range, though they are large enough for several pairs of chopines. I found that my feet were just small enough to fit yoga blocks, so I bought two of those. I began by patterning my shoes and tracing the pattern onto my cork blocks.

Next, I used a handheld power sander to achieve the 2-dimensional shape.


During the next step, I sanded to achieve a 3-dimensional shape. I used a low grit sandpaper to do the initial sanding and cutting away of material. Then I switched to a higher grit for fine sanding and evening things out.


The shoe covers were made of brocade. I patterned them with a lot of extra material, sewed them together, and attached them to the cork block base. I used cotton canvas as my insole.


For my soles, I cut black leather pieces and then attached them with nails. I added some trim to cover my edges and make the shoes look extra pretty. Tada!


Monday, February 6, 2012

Venetian Gown Construction

I wanted to share some of the major steps in the construction of my 1560s Venetian gown.
First, here is my base bodice shape. This is my linen lining, and then I used cotton canvas as an interlining and velvet as the fashion fabric.


This is the bodice all put together. I did the ladder lacing by placing a reinforced strip of fabric covered in evenly spaced grommets just inside the opening on each side of the bodice. The bodice itself has flat steel bones at the front edges, which help to keep it so perfectly straight.


My sleeves! I did cutwork for the sleeves, as well as the bottom hem of the dress. I made a stencil and then traced it onto the fabric. The cuts were made with a regular pair of scissors.


The sleeves attach to the bodice with ribbon ties. I also edged the sleeves with Venetian lace. Here, I've also added a front insert, which covers my corset. There is some debate on whether the corset goes under or over the chemise, but in every other period I've researched, the corset is always over the chemise. It's more practical that way, and I don't see why it should be any different here. Plus, there are some images that show partlets going all the way down to waist level, perhaps covering the corset. Who knows, maybe they did it both ways.


And the full gown! I made a partlet out of Venetian lace. The skirt is cartridge pleated by the traditional method. I tried a shortcut that I do for knife pleats but found that the traditional method was faster. Maybe I've just cartridge pleated so many skirts that it's not so bad anymore!


Friday, February 3, 2012

16th Century Reed Corset

It was time for a new 16th c. corset. My last one was boned with flat steel, and I use spiral and flat steel in my Victorian/fashion corsets, but I hadn't used reed before.

I wanted one corset that has a completely period look about, i.e. no visible machine stitching. This turns a corset into a very time-consuming project, and I know that no one will ever see it under my clothes, but I wanted just one. This is a note of importance, as it governed the way I chose to do things.

I decided to go strapless with this one, mainly because it's so much easier to hide under gowns that may have slender straps or almost off the shoulder cuts, and I wanted it to be very versatile.
I started by drafting a whole new pattern - two fronts and a center back. The tabs are placed so that they will distribute weight over my hips without digging in.
The corset is made of 4 layers - the lining is linen, interlining is cotton canvas, and the fashion fabric is silk backed with linen, in order to ensure lack of see-through-ness with the white.

The boning channels...I really went all out for this one...they're all hand stitched. About halfway through, I think I decided I was completely insane. I also became very thankful that I am small.


So, once that was all done, I made bias tape from my white silk and applied it to the bottom hem. Then it was time for boning. This was very difficult at first because I kept snapping reeds. Eventually, I got the feel for it, and things went much more smoothly after that point.


Next, I cut the reeds down, added bias tape to the top, and then applied grommets to the front of my corset. In many cases, this would be the last step. However, in this case, I was going all out. Time to cover the grommets! I stitched over every single one by hand and once again questioned my sanity. However, it was all worth it in the end when I had the following result. My perfect corset! It is my precious!
I will also note that the reeds are amazing! I think I like reed better than flat steel for this silhouette. It's so comfortable.