Monday, February 27, 2012

Festival of the Rose

To honor our lovely Queen, our kingdom had a Festival of the Rose event. I dressed in Persian garb and performed a belly dance with some other ladies from my barony. It's been a while since I've worn any of my Persian garb, but it still fits...at least mostly! Here, I'm wearing a red silk coat over a purple linen layer over a sort of gauzy chiffon layer that I had used primarily for the cool Persian-y print. The salwar - which you can't really see underneath all the skirt volume - are light brown raw silk. My hat is wool and brocade. These pieces were all based on roughly 15th c. sources, though there really was little change in Persian garb during the middle ages.

I also entered my 1570s Venetian gown into the arts and sciences display. You've seen that one before, so I won't explain it again. (:


Wednesday, February 22, 2012

Psanky

I recently went to a psanky workshop, taught by Kiena the Blue, here in my local barony. Psanky is the art of decorating eggs and dates all the way back to ancient societies. And it's lots of fun!
Kiena has made lots of beautiful psanky, and I was so happy to have a chance to learn from her. We each made one psanka in class. To decorate, we drew our designs on the eggs in light pencil, and then each time you apply a color, you apply wax to the egg in the areas you do not want the color to touch.

Here is my psanka! I hope this is my first of many, but we'll see. I already have more hobbies than I have time for. Oh, the woes of an artisan.


Tuesday, February 21, 2012

Queen's Champion

For our recent Queen's Champion tournament, I wore my 1495 Venetian gown. The dress has three layers: the camicia, gamurra, and giornea. My camicia is white linen, my gamurra is brocade, and my giornea is cotton velvet with hand-beaded details.


With Arianna! 

Coloring some scrolls.


Thursday, February 16, 2012

Venetian Male Outfit Construction

Here are some progress pictures from the construction of my boyfriend's 1560s Venetian outfit.
I made his doublet from a new pattern, drafted on his body and based on some extant patterns from Janet Arnold's Patterns of Fashion. His doublet is dupioni silk lined in black linen. The sleeves are brocade, and they attach with ribbon ties. For pants, he has the Venetian style in black linen.


To complete the ensemble, I made an overcoat / loose gown for him. The coat is made from the same velvet as my gown, and it is lined in black silk/rayon blend. I added faux fur trim to the front. The sleeves are slashed, and I made them by cutting strips of my velvet and silk and sewing them together. The undersleeves are brocade, made from the same pattern but without the slashing.


Wednesday, February 15, 2012

Viking Girl

I made this Viking dress a couple years ago, but I recently wore it to a Viking themed Yule, and I have some photos to share. This is actually only the second time I wore it because I broke one of my brooches, and it took me forever to get around to fixing it.
The underdress is made of linen, and the two outer layers are wool. The embroidery was done by hand while I was in grad school. I needed something to keep me busy during boring seminars!
Norse history is special to me because I'm half Swedish. While I haven't confirmed my lineage all the way to back to Viking times, I like to believe my ancestors were awesome Vikings.


Monday, February 13, 2012

Chopines

Chopines are these amazing platform shoes from the Italian Renaissance. They were quite helpful in keeping skirts out of dirty streets, and as with many things, they grew to become an elaborate fashion item.

I had wanted to make chopines for years, and finally, I got around to it! Oh, I had attempted it before. I tried wood blocks and found that my strength with tools was just not up to par. This time, I went with cork. You need high density cork for this project, and most of it comes in very large blocks that were out of my price range, though they are large enough for several pairs of chopines. I found that my feet were just small enough to fit yoga blocks, so I bought two of those. I began by patterning my shoes and tracing the pattern onto my cork blocks.

Next, I used a handheld power sander to achieve the 2-dimensional shape.


During the next step, I sanded to achieve a 3-dimensional shape. I used a low grit sandpaper to do the initial sanding and cutting away of material. Then I switched to a higher grit for fine sanding and evening things out.


The shoe covers were made of brocade. I patterned them with a lot of extra material, sewed them together, and attached them to the cork block base. I used cotton canvas as my insole.


For my soles, I cut black leather pieces and then attached them with nails. I added some trim to cover my edges and make the shoes look extra pretty. Tada!


Monday, February 6, 2012

Venetian Gown Construction

I wanted to share some of the major steps in the construction of my 1560s Venetian gown.
First, here is my base bodice shape. This is my linen lining, and then I used cotton canvas as an interlining and velvet as the fashion fabric.


This is the bodice all put together. I did the ladder lacing by placing a reinforced strip of fabric covered in evenly spaced grommets just inside the opening on each side of the bodice. The bodice itself has flat steel bones at the front edges, which help to keep it so perfectly straight.


My sleeves! I did cutwork for the sleeves, as well as the bottom hem of the dress. I made a stencil and then traced it onto the fabric. The cuts were made with a regular pair of scissors.


The sleeves attach to the bodice with ribbon ties. I also edged the sleeves with Venetian lace. Here, I've also added a front insert, which covers my corset. There is some debate on whether the corset goes under or over the chemise, but in every other period I've researched, the corset is always over the chemise. It's more practical that way, and I don't see why it should be any different here. Plus, there are some images that show partlets going all the way down to waist level, perhaps covering the corset. Who knows, maybe they did it both ways.


And the full gown! I made a partlet out of Venetian lace. The skirt is cartridge pleated by the traditional method. I tried a shortcut that I do for knife pleats but found that the traditional method was faster. Maybe I've just cartridge pleated so many skirts that it's not so bad anymore!


Friday, February 3, 2012

16th Century Reed Corset

It was time for a new 16th c. corset. My last one was boned with flat steel, and I use spiral and flat steel in my Victorian/fashion corsets, but I hadn't used reed before.

I wanted one corset that has a completely period look about, i.e. no visible machine stitching. This turns a corset into a very time-consuming project, and I know that no one will ever see it under my clothes, but I wanted just one. This is a note of importance, as it governed the way I chose to do things.

I decided to go strapless with this one, mainly because it's so much easier to hide under gowns that may have slender straps or almost off the shoulder cuts, and I wanted it to be very versatile.
I started by drafting a whole new pattern - two fronts and a center back. The tabs are placed so that they will distribute weight over my hips without digging in.
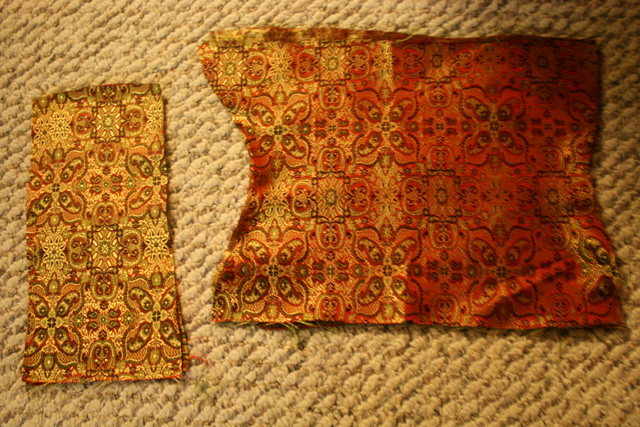
The corset is made of 4 layers - the lining is linen, interlining is cotton canvas, and the fashion fabric is silk backed with linen, in order to ensure lack of see-through-ness with the white.

The boning channels...I really went all out for this one...they're all hand stitched. About halfway through, I think I decided I was completely insane. I also became very thankful that I am small.


So, once that was all done, I made bias tape from my white silk and applied it to the bottom hem. Then it was time for boning. This was very difficult at first because I kept snapping reeds. Eventually, I got the feel for it, and things went much more smoothly after that point.


Next, I cut the reeds down, added bias tape to the top, and then applied grommets to the front of my corset. In many cases, this would be the last step. However, in this case, I was going all out. Time to cover the grommets! I stitched over every single one by hand and once again questioned my sanity. However, it was all worth it in the end when I had the following result. My perfect corset! It is my precious!
I will also note that the reeds are amazing! I think I like reed better than flat steel for this silhouette. It's so comfortable.


Thursday, February 2, 2012

1560s Venetian Court Gown

My most recent -big- project was a Venetian court gown from the 1560s. This was a very ambitious project, probably the most ambitious garb I've made to date, but it's something I've always wanted to do. I completed it in time for coronation in November. Our current Queen of Caid is Venetian, so it was the perfect opportunity.

I will create more posts to highlight the construction process, as well as some individual elements. To begin, I would like to share a couple photos from coronation, along with a list of the pieces involved in the garb.

My dress consists of the following pieces:
-chemise/camicia
-corset
-underskirt
-gown
-detachable sleeves
-front corset cover insert
-partlet
-jewelry - necklaces, earrings, girdle
-flag fan
-chopines

To match my gown, I also made a full Venetian outfit for my boyfriend. His consists of:
-undershirt/smock
-doublet
-detachable sleeves
-Venetian pants
-hose
-hat with feather
-overcoat / loose gown


Wednesday, February 1, 2012

Introduction

Hello!
My name is Daisy, also known in the SCA as Medb ingen Eochaid (Maeve). I have been sewing and costuming since I was a small child. I grew up in a family of Civil War reenactors and Tolkien fanatics, and then in my adult life I joined the SCA. Professionally, I am a fashion designer, operating under the name Daisy Viktoria.


I plan to use this blog as a sort of Dress Diaries site. I've wanted to open my own dress diaries for some time, so why not right now?


Stay tuned for updates!